
Automapping in Batches
What is a Automapping in Batches?
Automapping in batches is a technique to split the retrieved records from the Query Staging Tool into separate clusters followed by running the automapper on those queried records in a slightly staggered formation.
Why would a client use this technique?
Automapping in bunches is useful when automapping relatively large data sets at once such as greater than 2,000 records. This approach also expedites the automapping process since the Automapper is being run multiple times at once.
The client may not necessarily be executing the Automapper in this fashion since it involves several steps and requires a manipulation of the client_gis_config.yaml file. This system is recommended to only be used by W employees.
Setting Up the Query Staging Tables
To find how many legal items are queued for automapping, run the Query Staging Tool.
For steps on how to run the Query Staging Tool, please refer to one of the two articles:
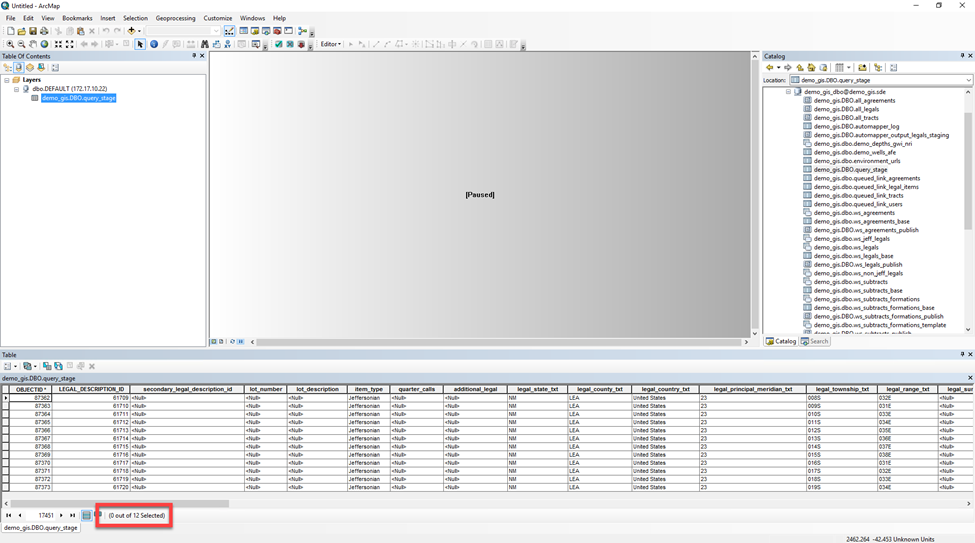
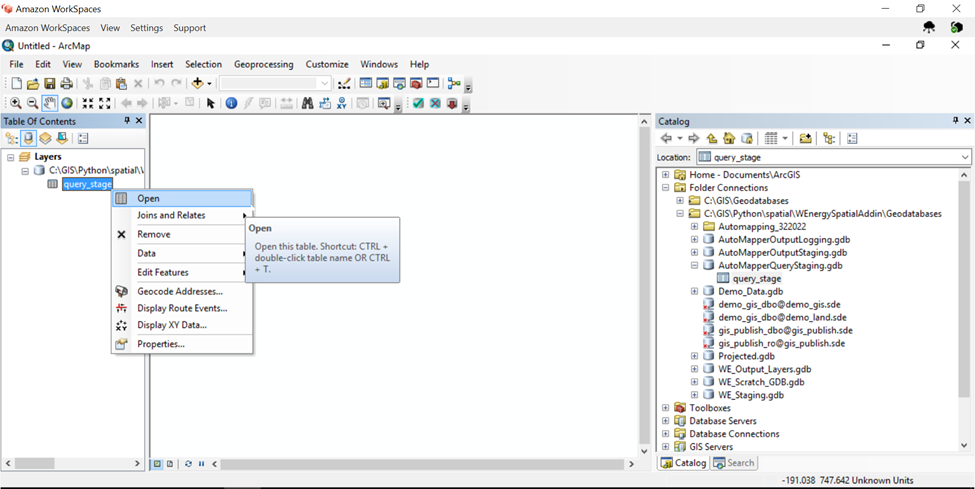
To verify how many records are queued for automapping, one can drag and drop the query_stage table to the dataframe.
In this example, there are 12 legal items, but this is normally performed on data sets much larger.
Creating Separate Staging Tables
In the Catalog Pane, create anew folder under the C:\GIS\Python\spatial\WEnergySpatialAddin\Geodatabases folder.
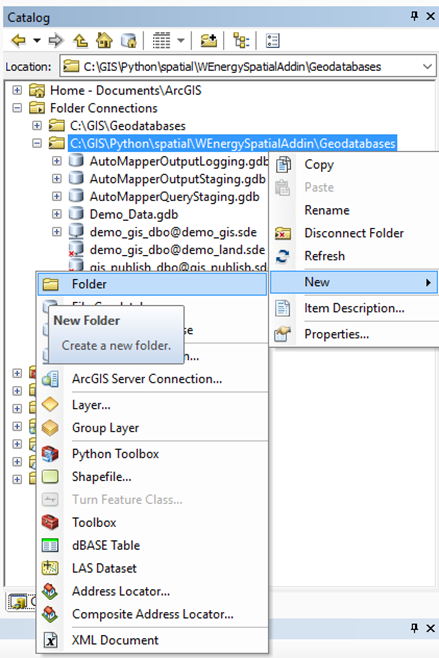
In this example, the new folder is named Automapping_322022.
Open ArcCatalog.
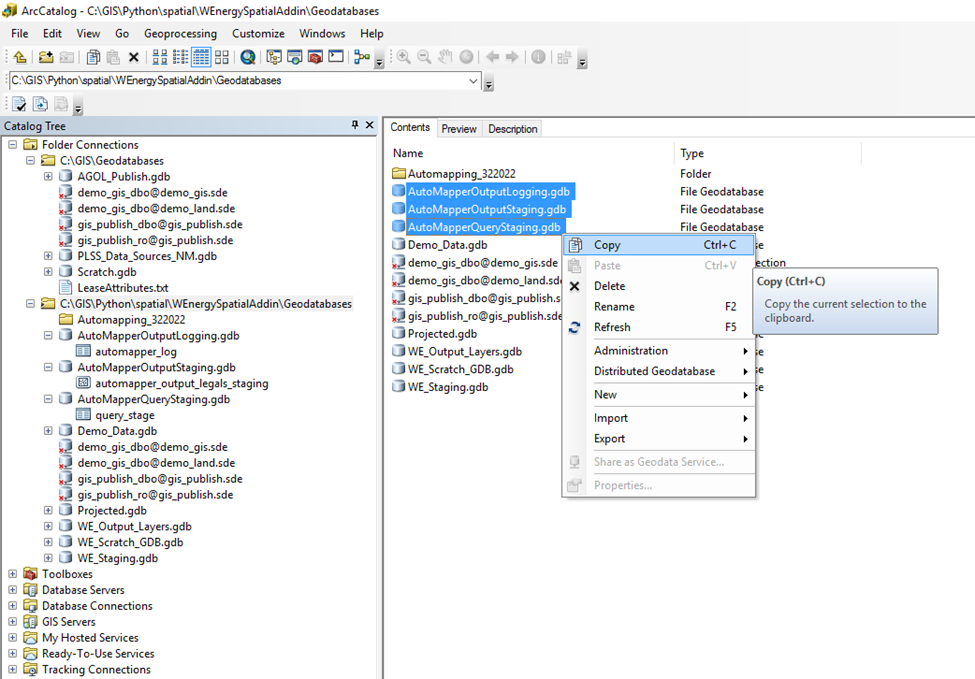
In the Catalog Tree, copy the 3 file geodatabases (fGDBs) shown in the screenshot below.
Paste them into the new folder.
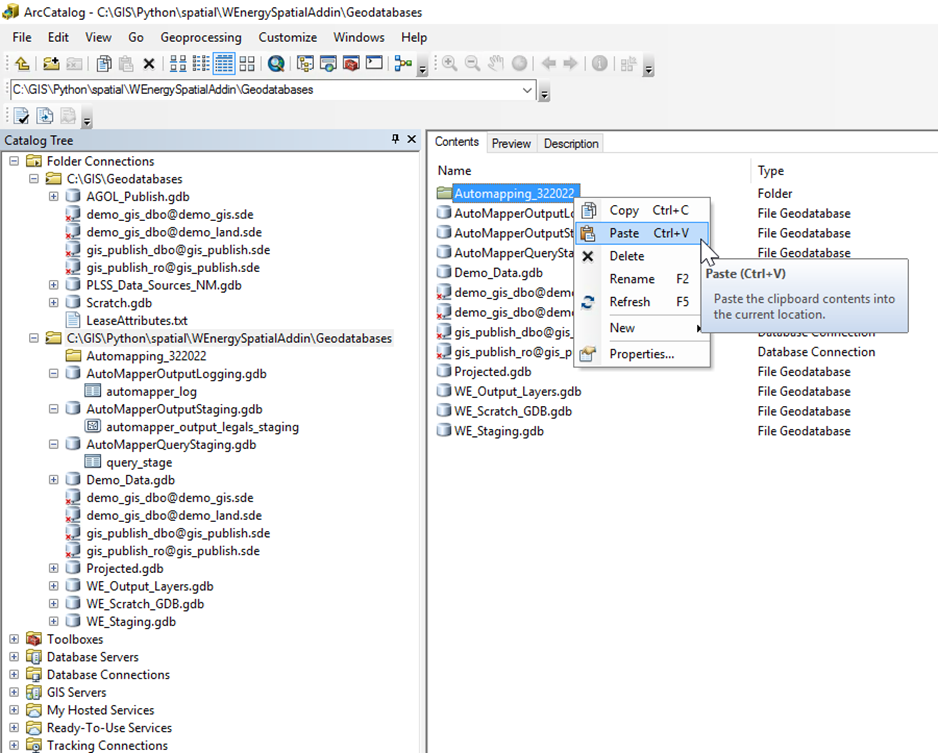
Expand the 3 fGDBs that were copied into the new folder.
The only tables that should be in those 3 fGDBs are:
automapper_log
automapper_output_legals_staging
All other tables should be deleted in the pasted fGDBs.
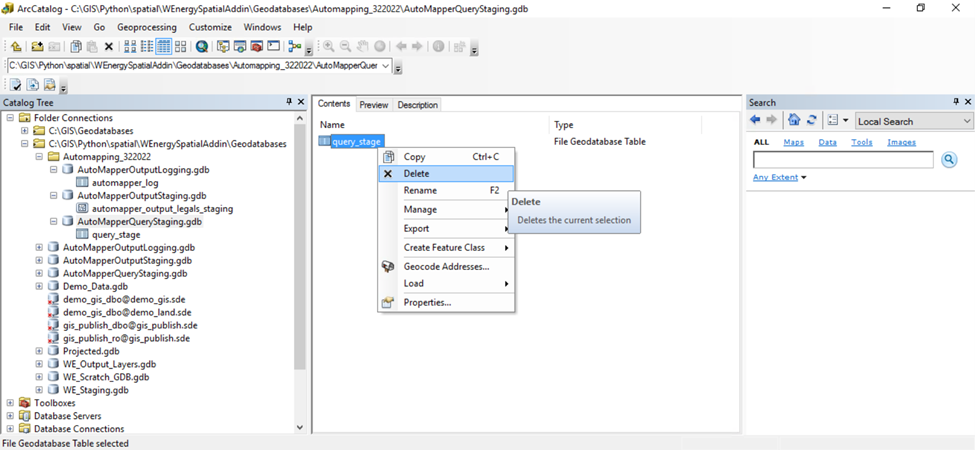
In the Catalog Tree, select the new folder with the 3 fGDBs.
In the Contents pane, select all 3 fGDBs.
Copy and paste the selection 6 times in the same location.
Please delete the fGDBs without numbers.
You should have 18 fGDBs now.
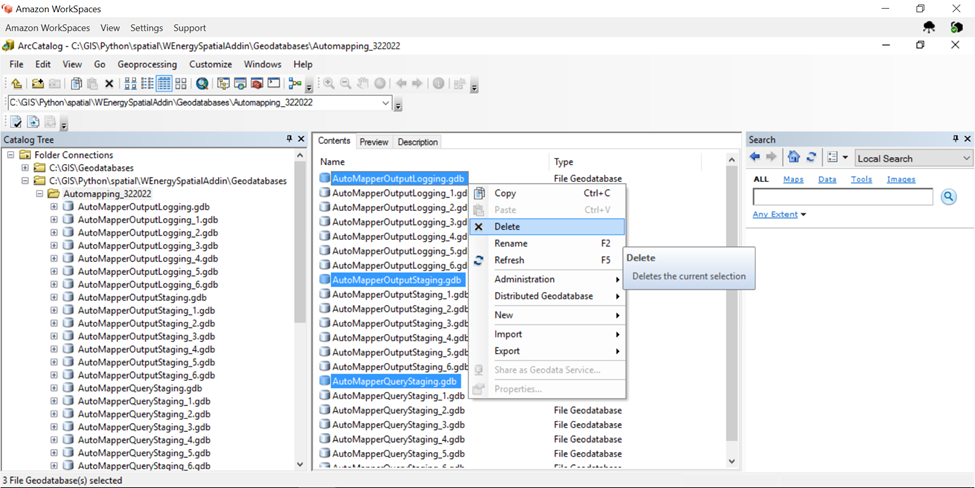
We will have 6 processes and each process will reference a separate trio of feature tables/classes.
Populating the Staging Tables
Switching to ArcMap, drag and drop the query_stage table into the dataframe.
In the table, select the Select by Attributes tool.
Type in the Definition Query for the records that will go into the 1st of the six fGDBs.
In this scenario, since there are 12 legal items and 6 fGDBs, the first 2 records were selected.
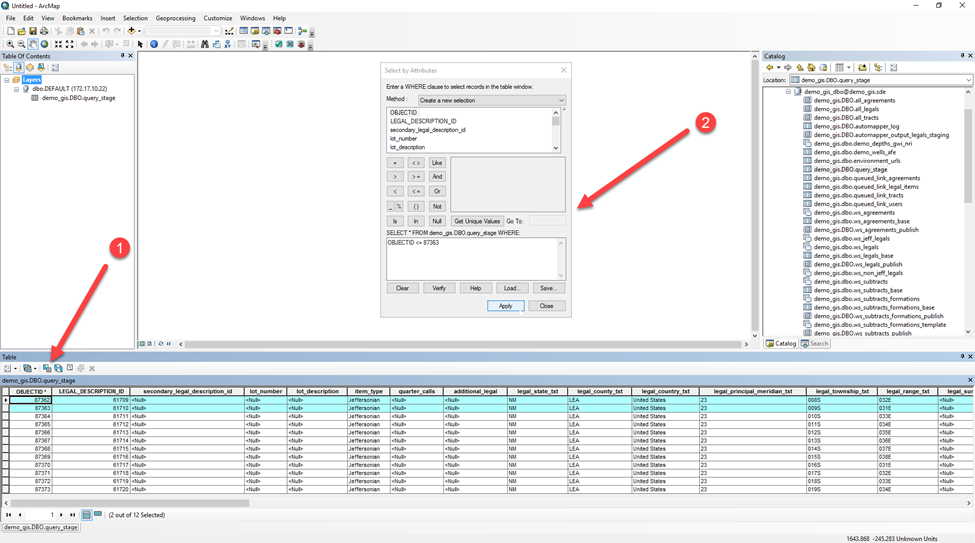
Export the selected legal items by navigating to the Table Options followed by Export…
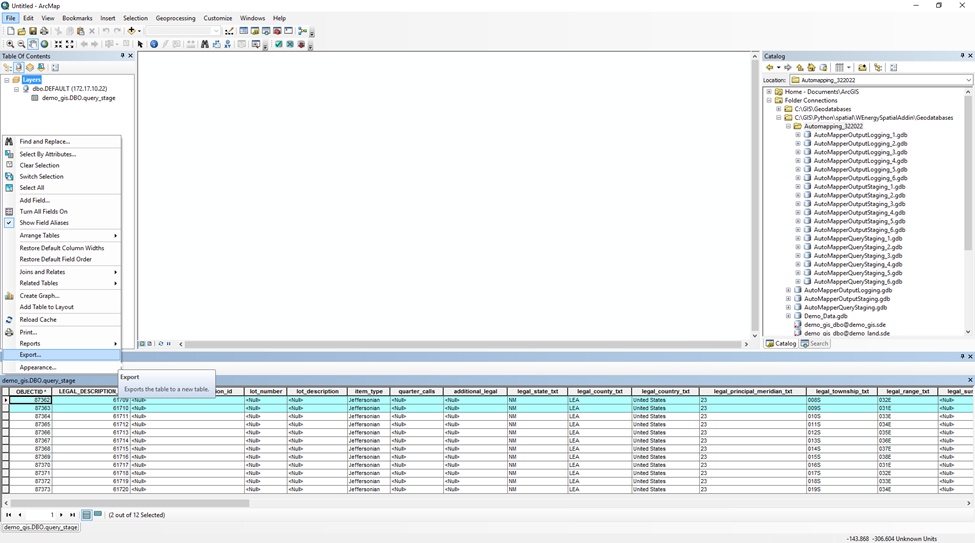
Change the destination of the export by selecting the folder icon in the lower right corner of the pop up.
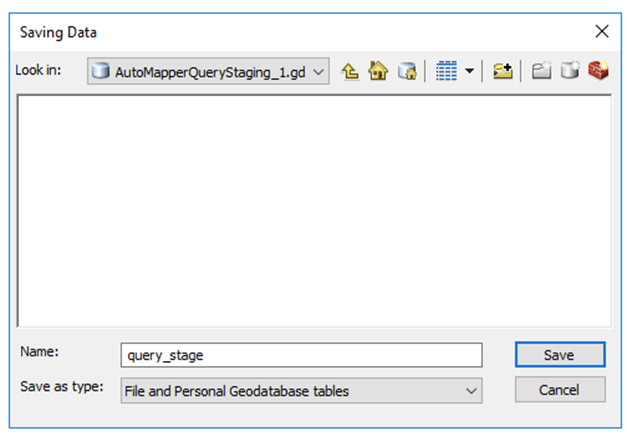
Update the destination to AutoMapperQueryStaging_1.gdb.
Double-click into the fGDB.
Rename the export to query_stage.
Hit Save.
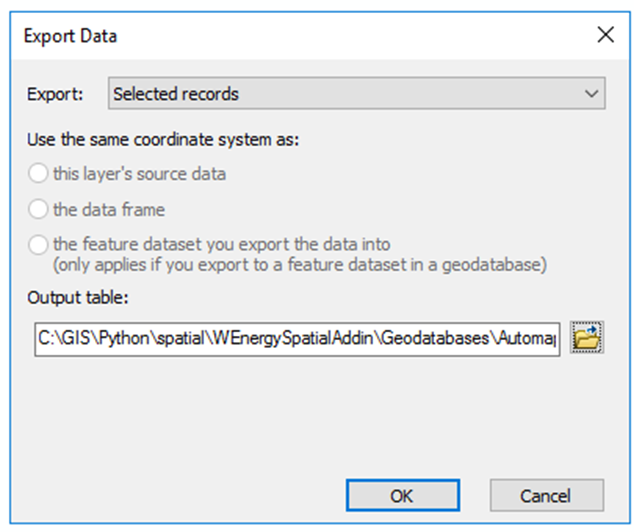
Hit OK.
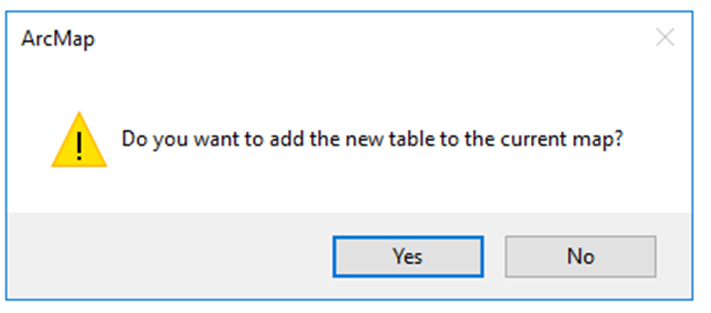
Select No when asked to add the new table to the current map.
To repeat the process for the 2nd batch of the 6 batches, update the Select by Attributes on the original query_stage table to the 2nd batch of legal items.
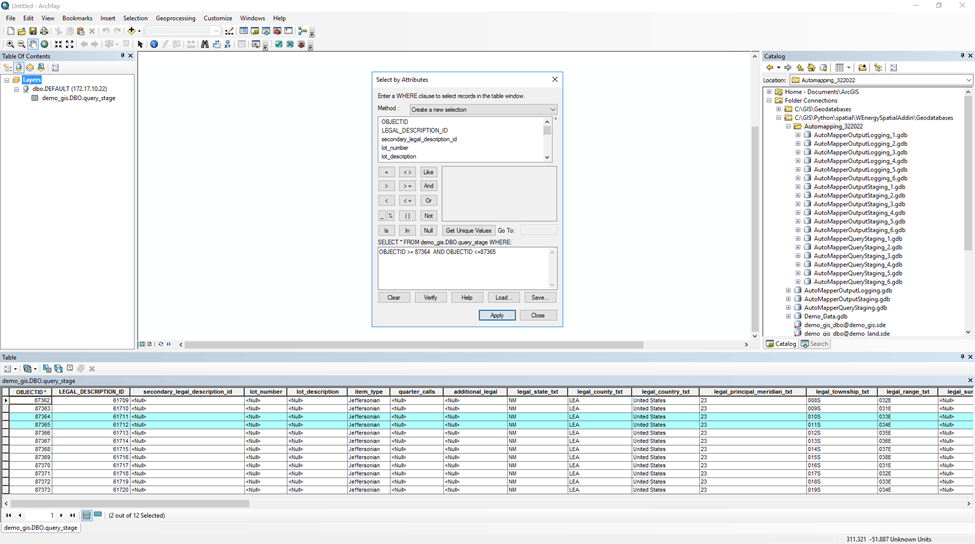
Navigate to the Table Options.
Select Export…
Double-click into the AutoMapperQueryStaging_2.gdb.
Rename the export to query_stage.
Hit Save.
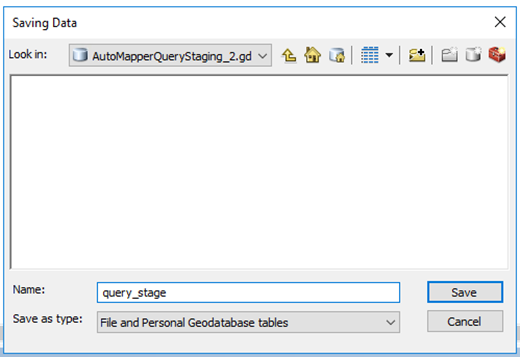
The pop up should update like so.
Hit OK.
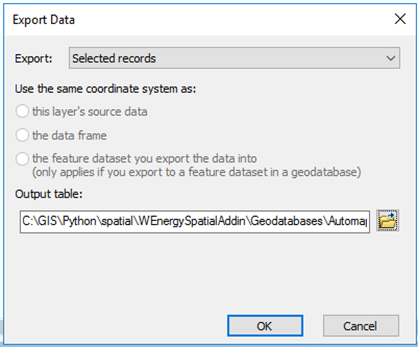
Repeat this process four more times into the four remaining fGDBs.
Updating the client_gis_config.yaml File
Navigate to the client_gis_config.yaml file.
This file is located here in the file drive:
Test: C:\GIS\Python\spatial\Test\WEnergySpatialAddin\Install\client_gis_config.yaml
Prod: C:\GIS\Python\spatial\Prod\WEnergySpatialAddin\Install\client_gis_config.yaml
Open the file with Notepad++.
Comment out the line that holds the file path location for the query_stage table.
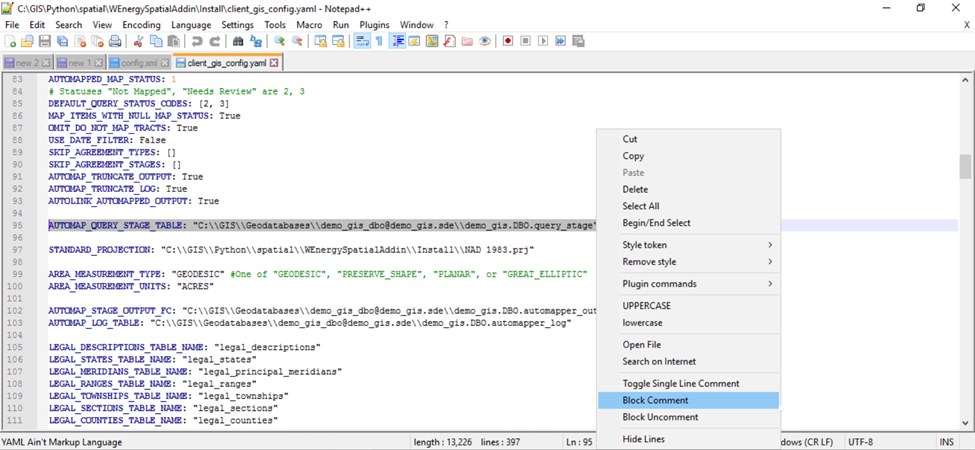
Copy the same line and paste it 6 times below.
Please update each line to the file path location of the next fGDB.
Uncomment the first of the 6 new fGDBs.
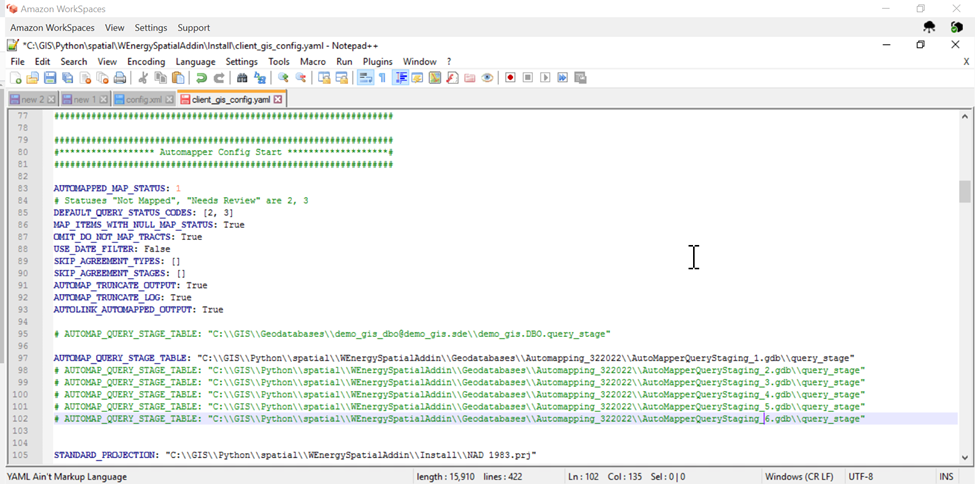
Repeat the same process for the line that holds the file location for the automapper_output_legals_staging table.
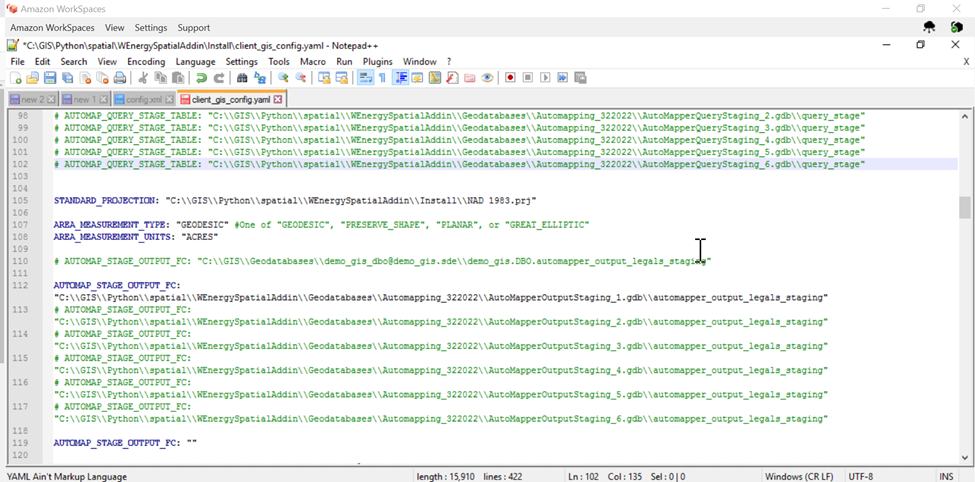
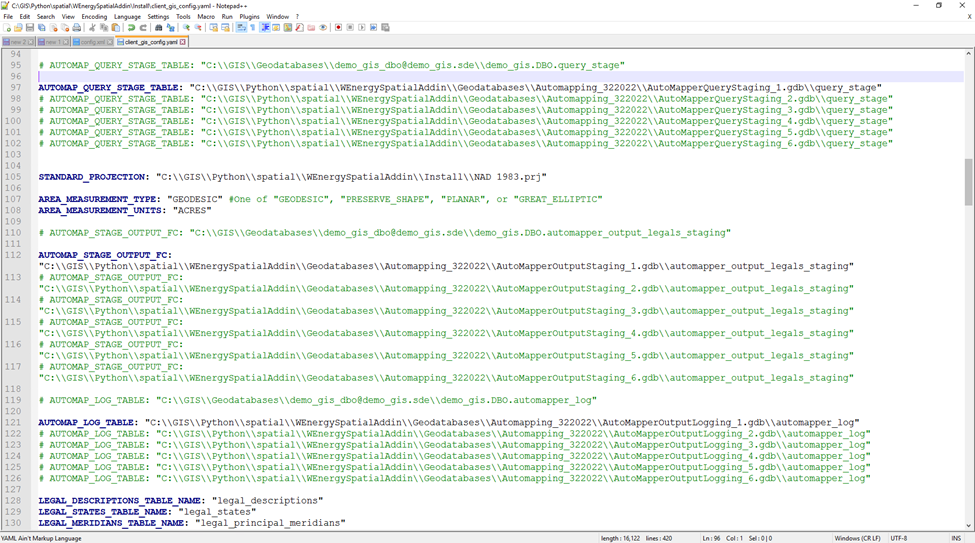
Repeat the process one final time for the line that holds the file path to the automapper_log table.
Ensure the AUTOLINK_AUTOMAPPED_OUTPUT config is set to False.
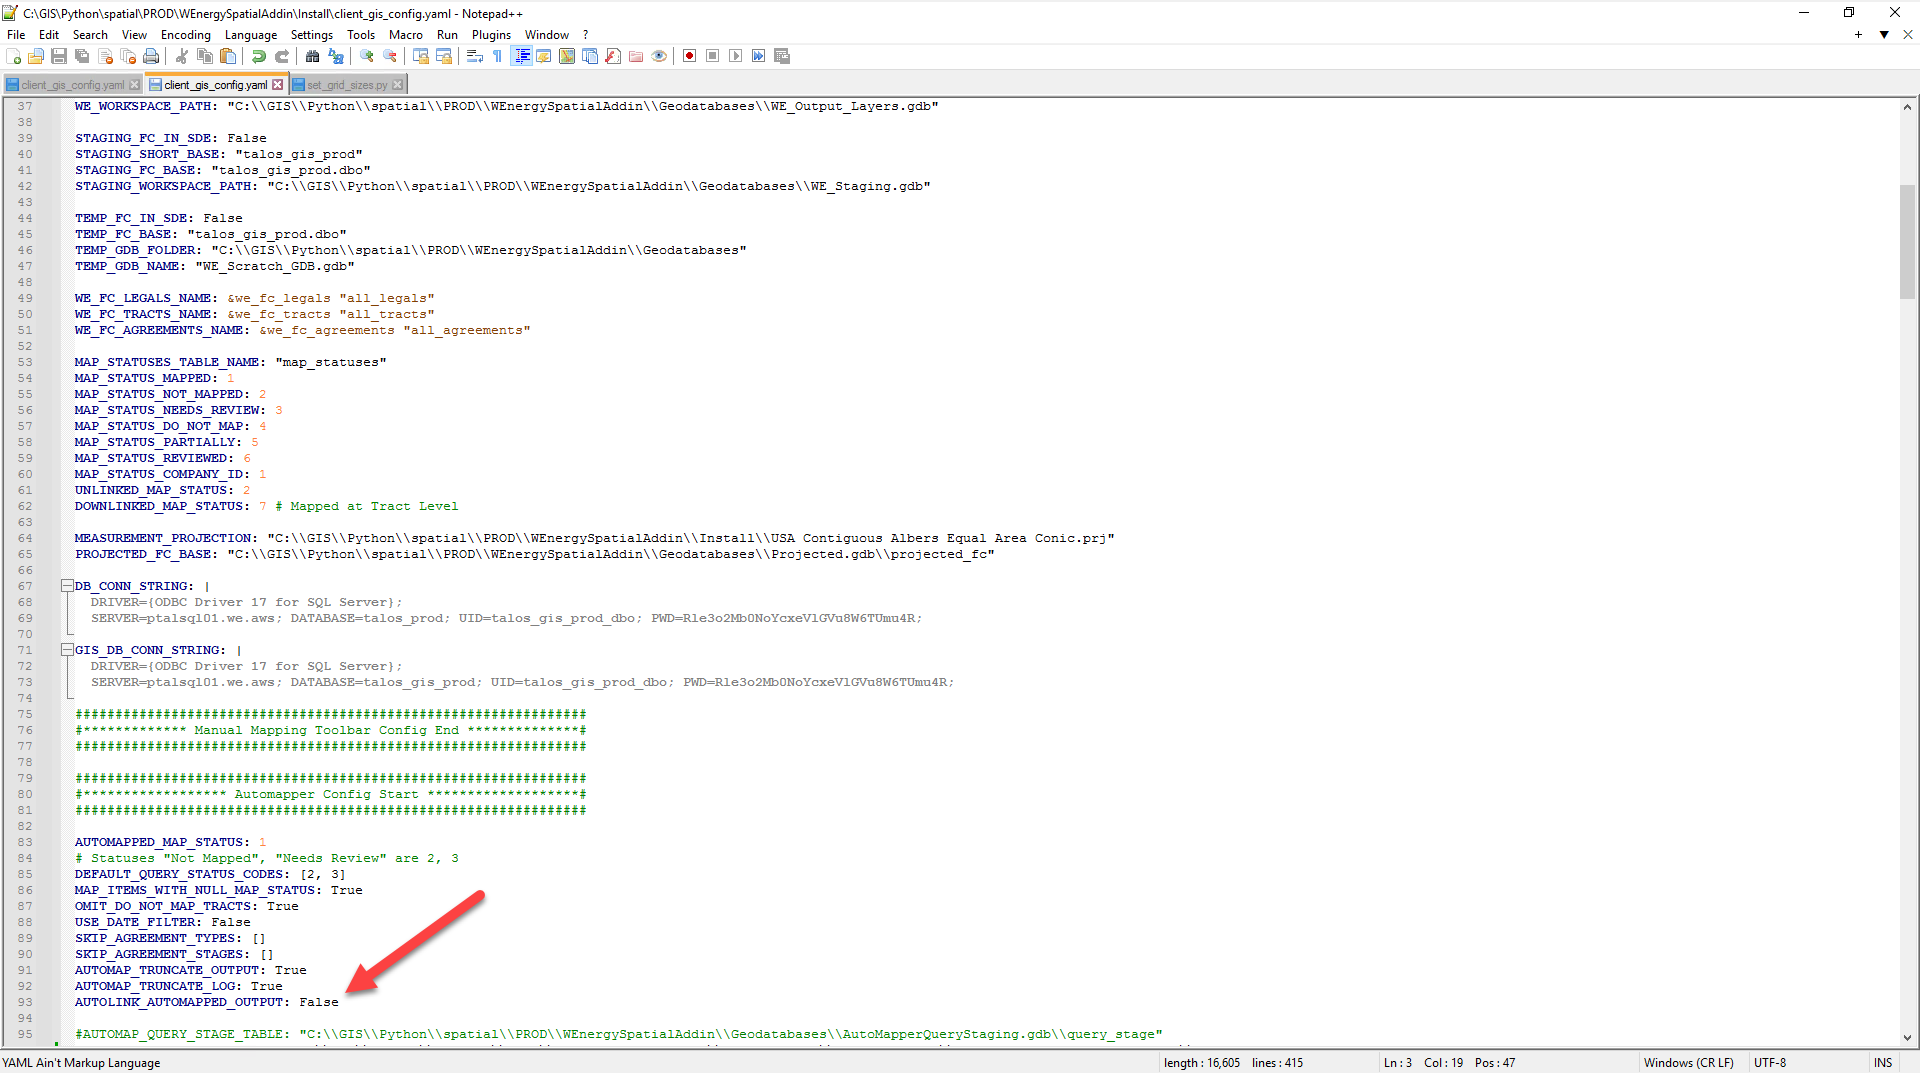
When automapping in batches, it is important to turn off autolink.
Autolinking multiple batches at once can cause issues, thus we will temporarily have this config set to False.
Save the client_gis_config.yaml file.
Close out all windows and applications on the VDI.
Running the Automapper
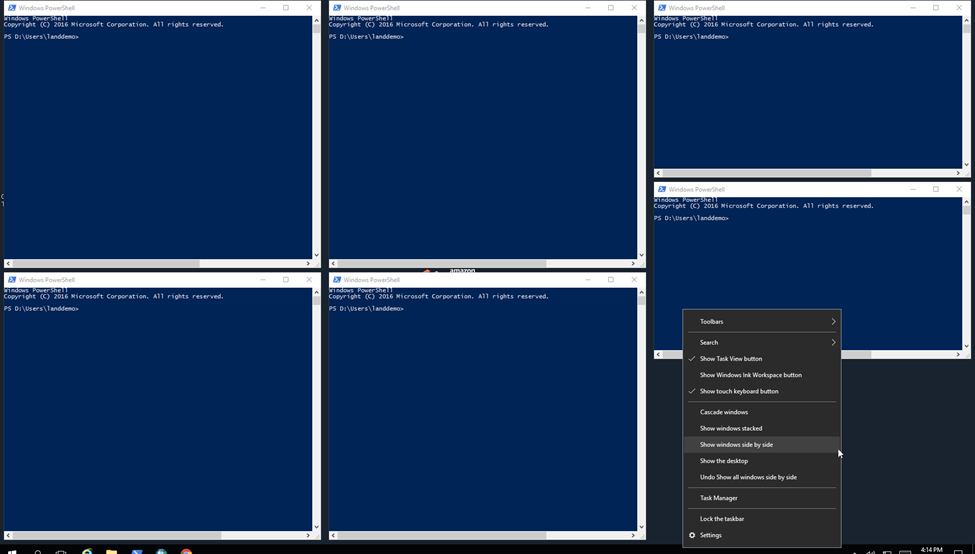
Open Windows PowerShell six times.
To have the windows next to each other, you can right-click on the task bar at the bottom.
Select Show windows side by side.
Switch all of the PowerShell windows to the C:\… Install file path.
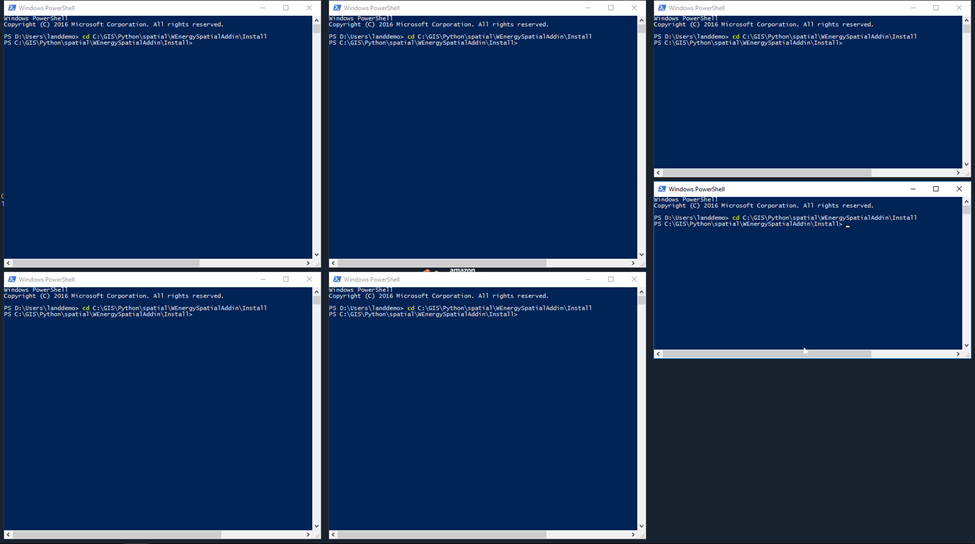
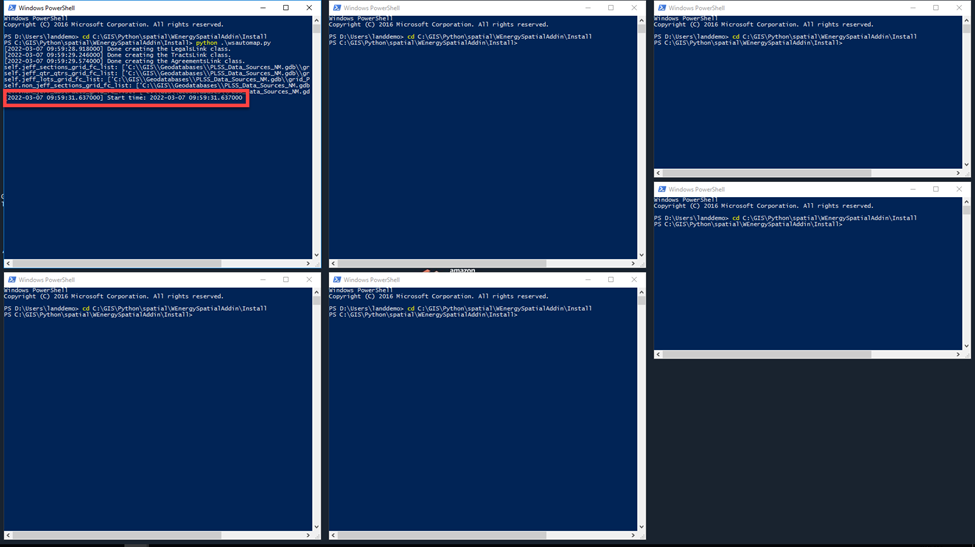
Kick off the 1st Automapper job by typing in “python .\wsautomap.py” and hit Enter.
Once the PowerShell window says “Start time”, you can proceed with updating the values in the client_gis_config.yaml file, saving the file, and running the PowerShell window.
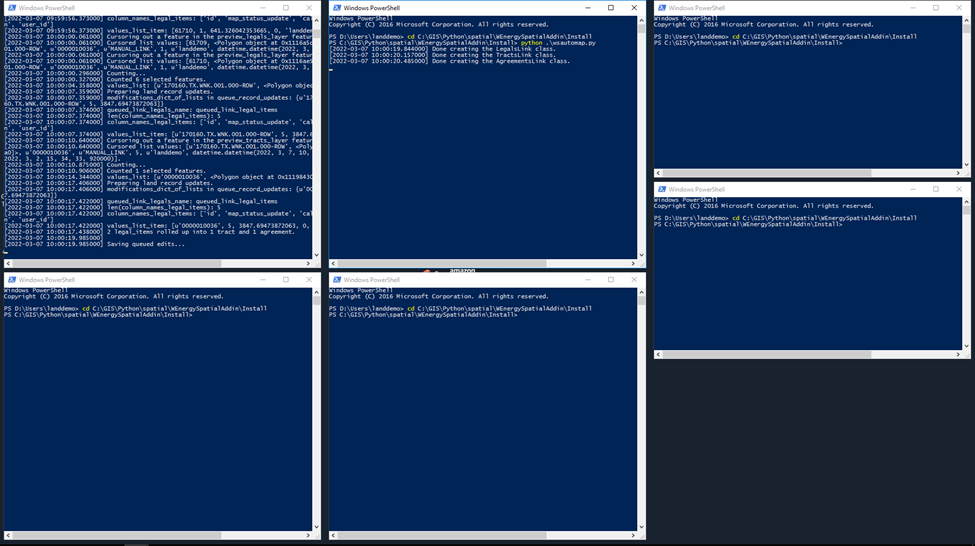
Once all of the PowerShell windows finish outputting log information and have the C:\ drive blinking the next command, the mapping session has finished.
Exit all PowerShell windows.
Manually Linking the Output
The output polygons have been mapped in the automapper_output_legals_staging feature classes.
Since we turned off autolinking in the client_gis_config.yaml file, we must manually link the output polygons in those feature classes.
Open ArcMap.
Drag and drop the AutoMapperOutputStaging_1.gdb/automapper_output_legals_staging feature class to the dataframe.
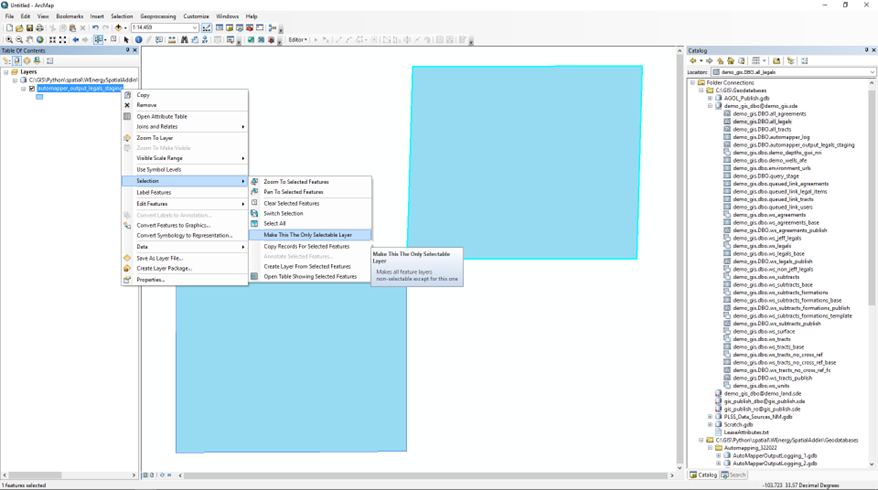
Make this layer the only selectable layer.
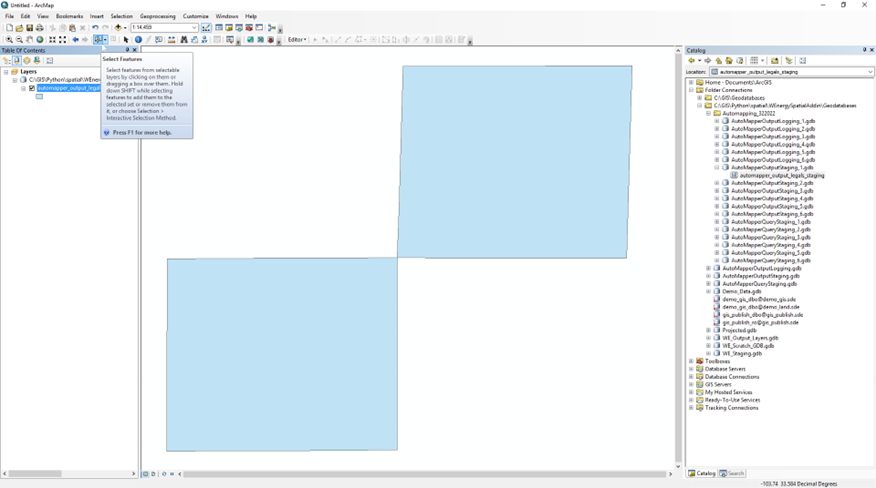
Select the Select Features tool.
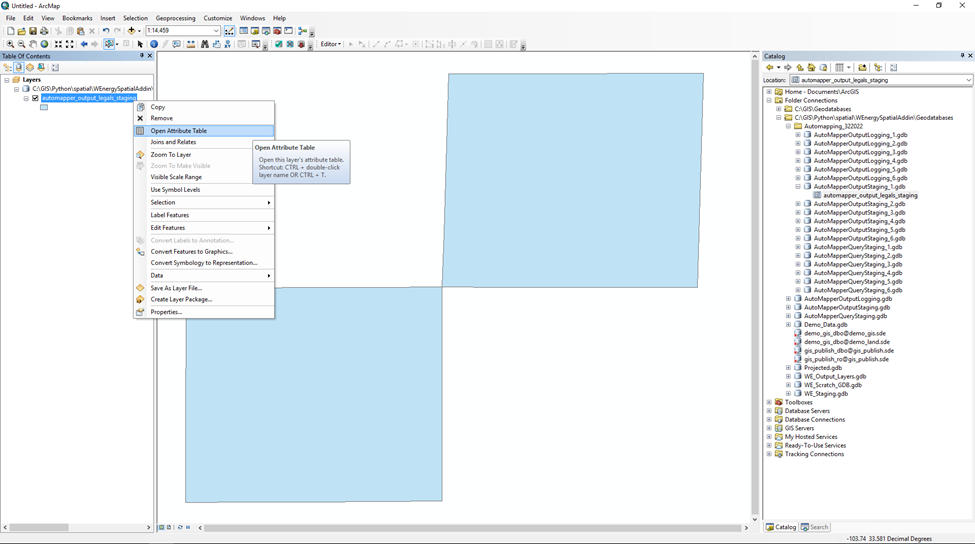
Open the Attribute Table.
Select all of the polygons to be manually linked.
Click on the Link Polygons tool.
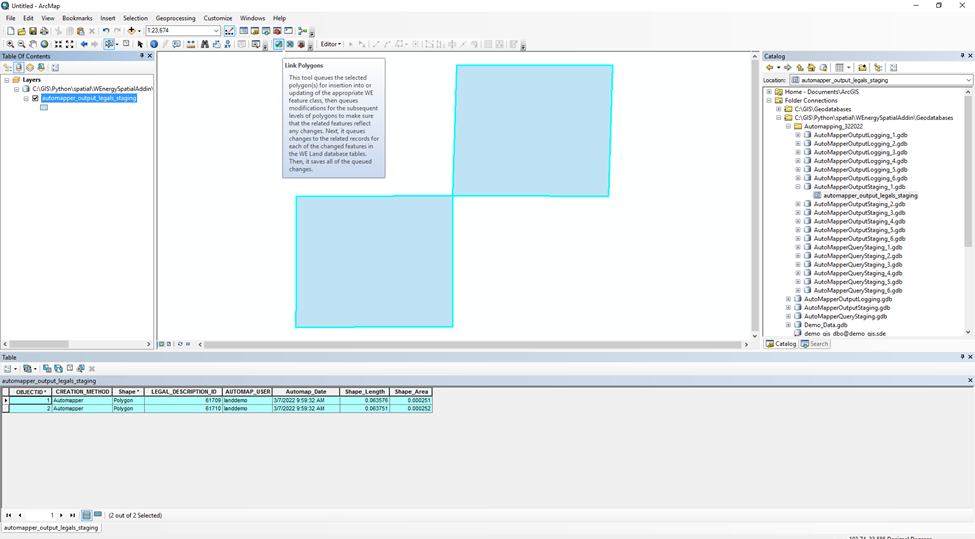
Select OK on the popup window.
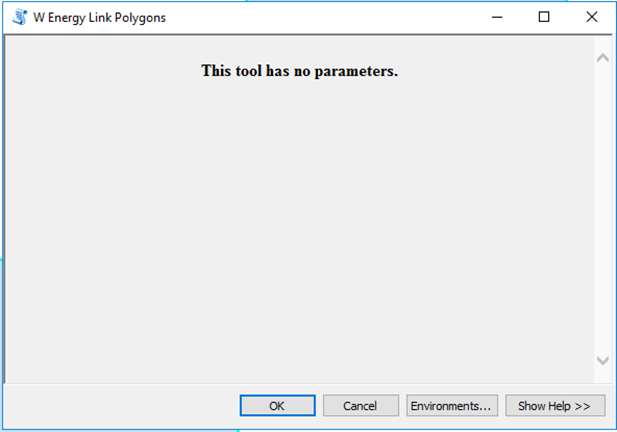
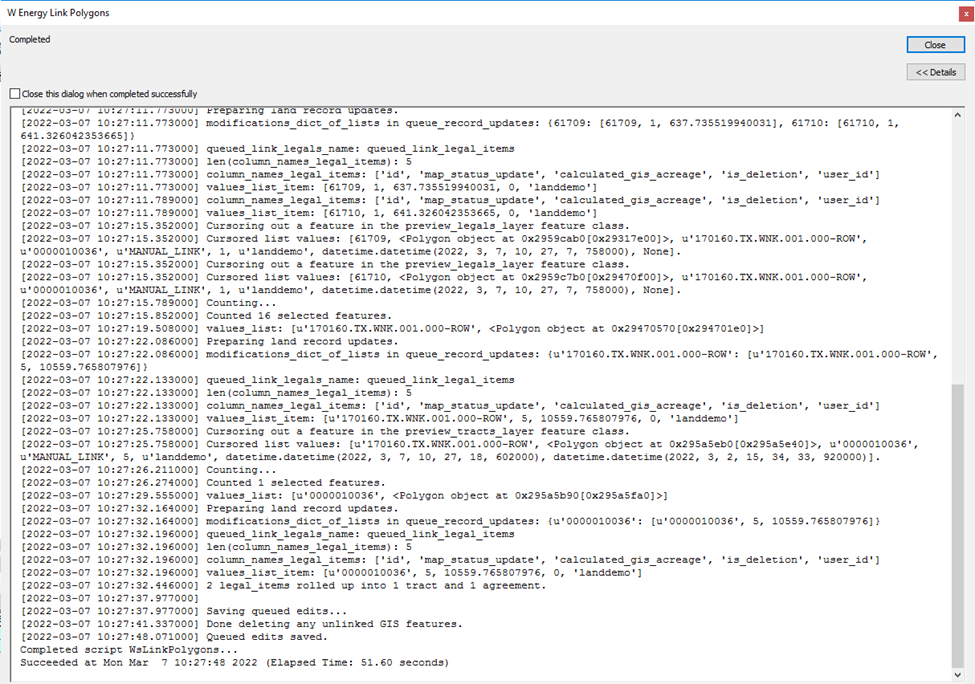
Once the popup says Completed at the top and Queued edits saved at the bottom, the linking completed.
Validating the Results
Drag and drop the all_legals feature class to the dataframe.
Confirm the polygons have been linked to legal items successfully.
Confirm the polygons have been inserted into the Feature Class Roll Up and spatial views.
Tip: Open the Attribute Table to the all_legals layer and double-click the Updated_at field twice to sort the layer by most recently updated.
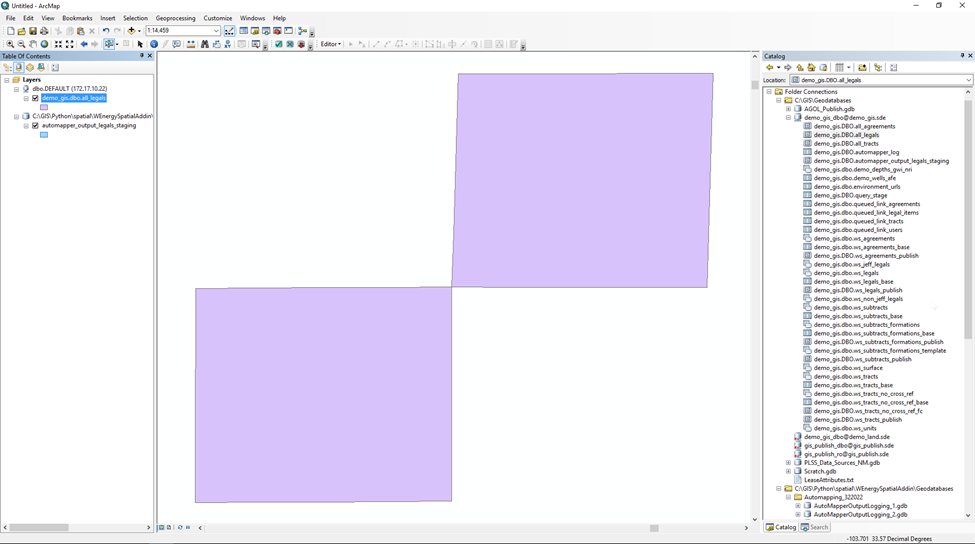
The polygons stacking up in the output staging and all_legals feature classes show that the link was successful.
For a more thorough QA, verify the other layers also have polygons:
all_tracts, all_agreements, ws_legals, ws_tracts, ws_agreements
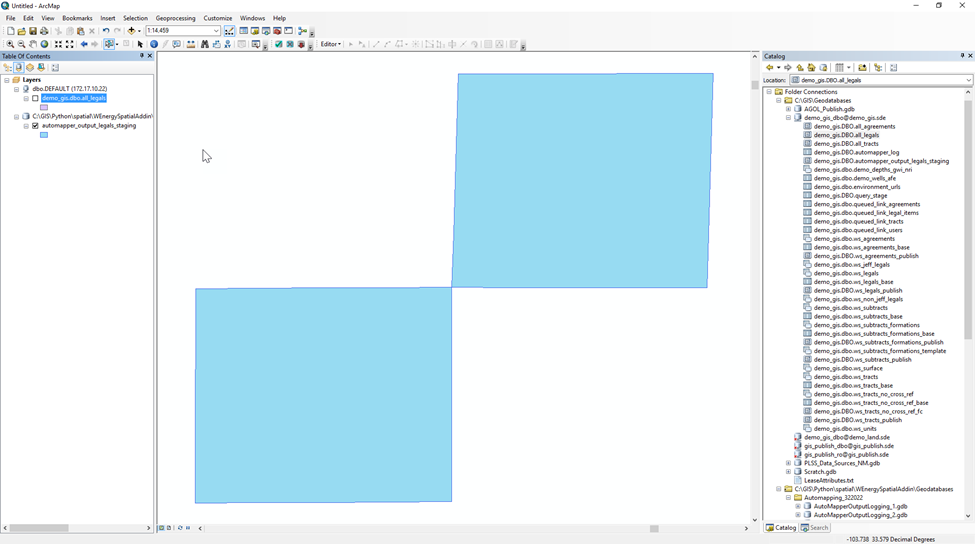
Repeat the linking process for the remaining 5 automapper_output_legals_staging feature classes.
Revert the AUTOLINK_AUTOMAPPED_OUTPUT config back to True and save the client_gis_config.yaml.