
Create Check Input Record
What is a Check Input Record
A Check Input Record represent a check that a client receives revenue from an operator that needs to be processed with the system. A Check Input Record consists of a Header and Details. The Header is a summary of the check and consists of important information such as Accounting Date, Remitter Check Cross-Reference, Remitter CI Layout, Check Amount, Check Date, Remitter Check Number, and the Remitter Owner Number. The Details are the specific line items containing revenue information that makes up the total of the check.
How to create a Check Input Record in the system
Before a Check Input record can be created Remitter Cross References and Check Input Layouts must be set up first.
Once you receive a check, you are ready to create a Check Input Record.
Navigate to the Check Inputs screen in Check Input.
Hit the “New Check Input” button.
The Check Input Header pop-up window will appear to be filled in.
Enter Accounting Date - determines when the check will be picked up by Company Processing.
Select Remitter Check Cross-Ref from the picker - this will populate the CI Layout based on the Remitter Cross-Ref setup.
Enter the Check Amount and Check Date.
Enter the Remitter Check Number - this is the number provided by the remitter.
Enter the Remitter Number - W Energy BA number for the Remitter.
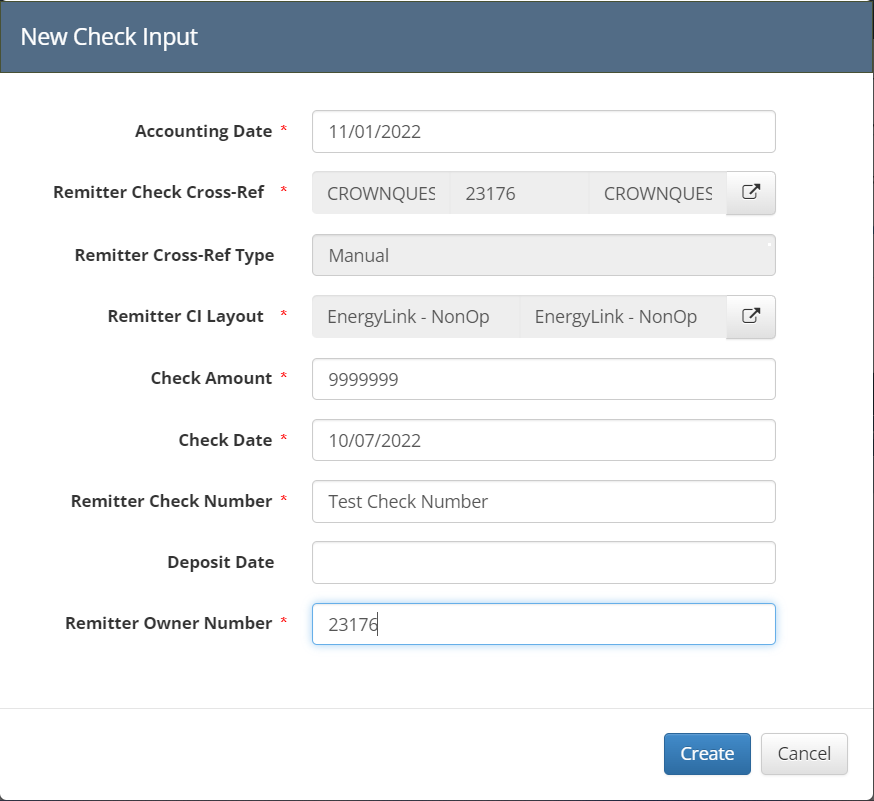
Hit the “Create” button and the Check Input Record will be created.
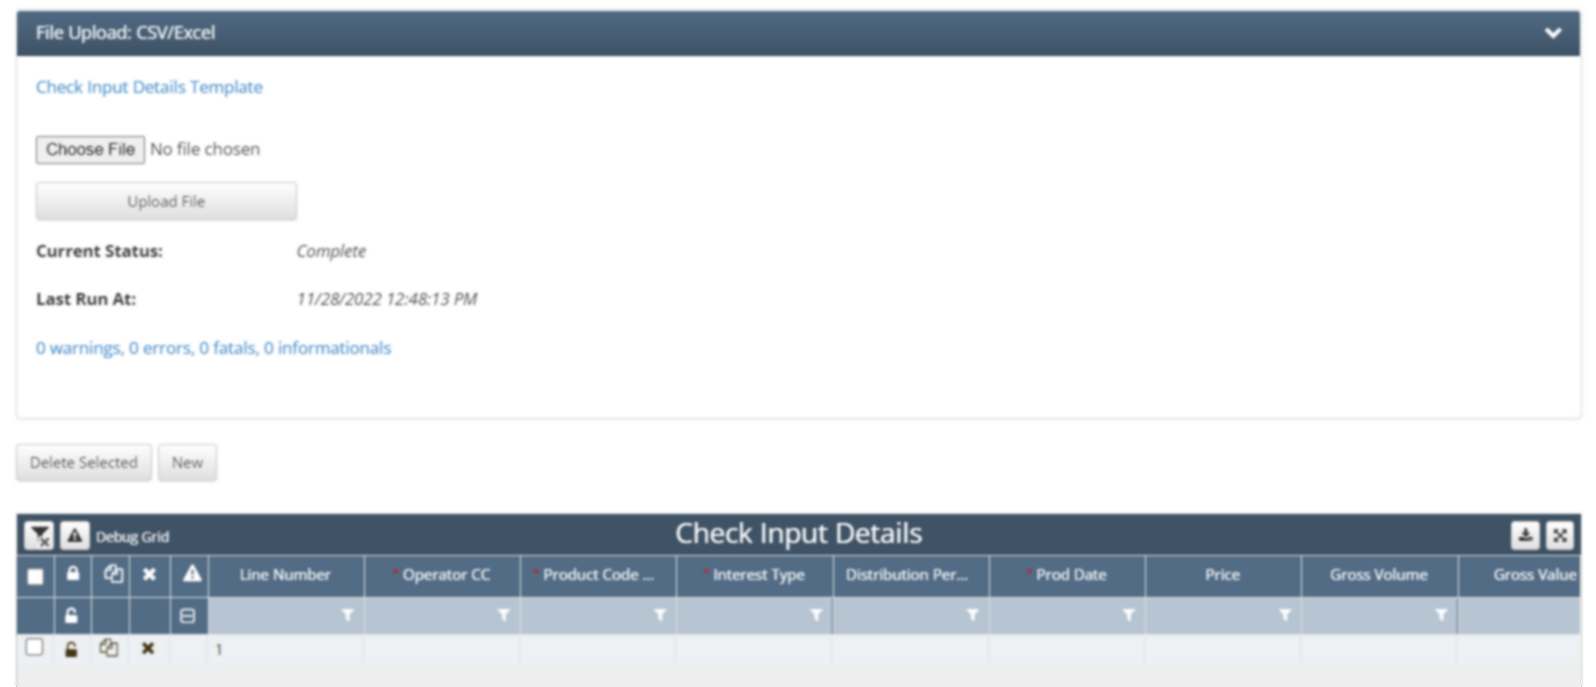
Populate the Check Input Details - there are 2 options: Manual Entry or File Import.
Manual Entry
Hit the “New” button above the Check Input Details grid for each distinct detail lines.
“Key as you see” the check input detail line from the remitter check.
File Import - can be excel, csv, or CEDEX.
Expand the “File Upload: CSV/Excel” menu.
Hit the “Choose File” button to select the desired check details file. **It is important that the file format matches the CI Layout used for this check**
Hit the “Upload File” button.
Once all detail lines are populated to satisfaction, hit the “Save” button at the top of the screen and the record is ready to be translated.
How does this concept impact/feed other areas in the application?
The Check Input Record is an essential part of processing revenue in the Check Input Module. Once the record has been created, the record must be translated and then it will be ready to be picked up by Company Processing.