
AFE's
What Configurations apply when using XYZ
afe_cost_center_required: true
afe_cost_center_required: False
Brief Description: "Require Cost Center", that will require a Cost Center when an AFE
is created when the config is set to True. Override this in config.yml by setting the
Boolean to false.
Part 1: How to setup an AFE in the system
Once a project has been created, we can move to AFEs screen to start creating AFEs
Click on “edit” icon next to the project you wish to create an AFE in.
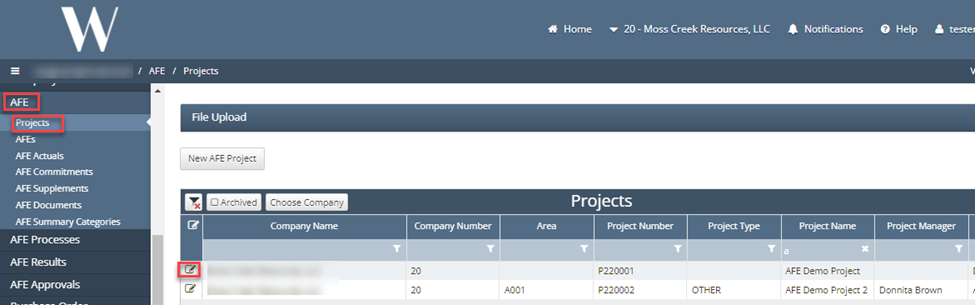
Navigate to Related AFEs tab where you will click “New AFE Header” button.
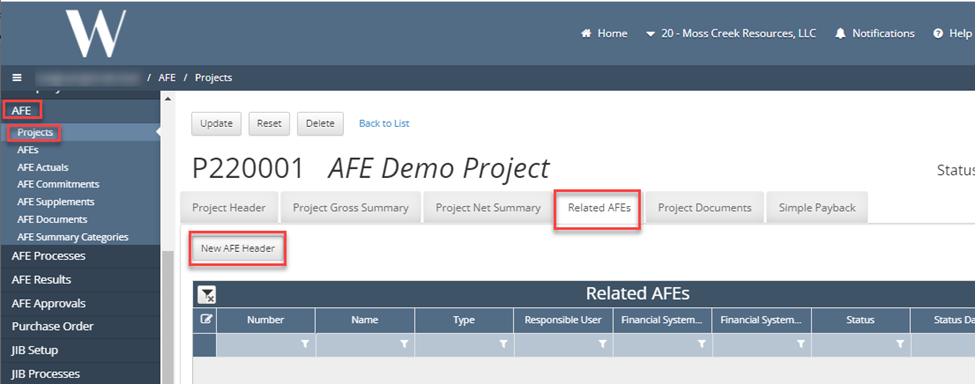
A prompt will pop up where user is required to create an AFE name.
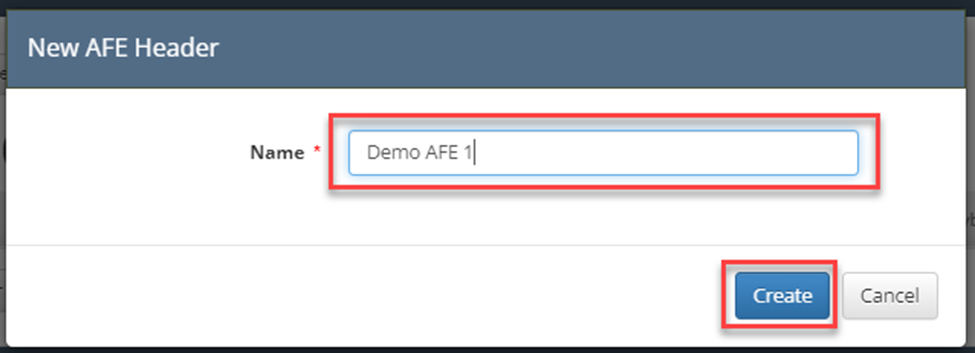
Once AFE has been created, user should notice that the AFE has been moved to the AFE screen and should be displaying the AFE header tab.
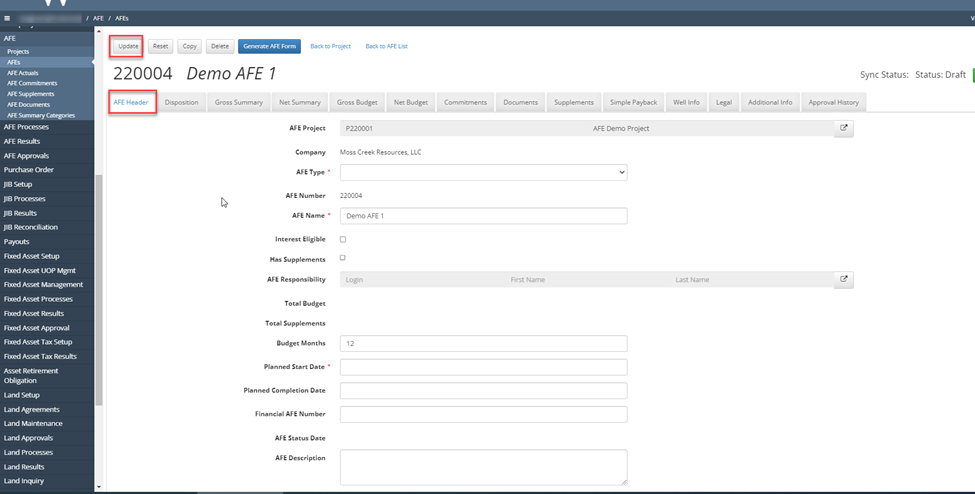
On the AFE Header tab, populate the required fields ( *)
AFE Type*
AFE Name*
Budget Months: defaults to 12 but can be adjusted to different if needed.
Planned Start Date* - drives what month the budget period starts.
Financial AFE Number – this can be used to track the AFE that may have a different number is another system.
Financial Cost Center*
Upstream Division Order – can be used to calculate Net Budget if Gross is entered.
Field*
Net Interest – if a different interest wants to be used than what is on the deck.
Override Net Interest – check the box if entering a Net Interest.
Click on Update at the top of the screen.
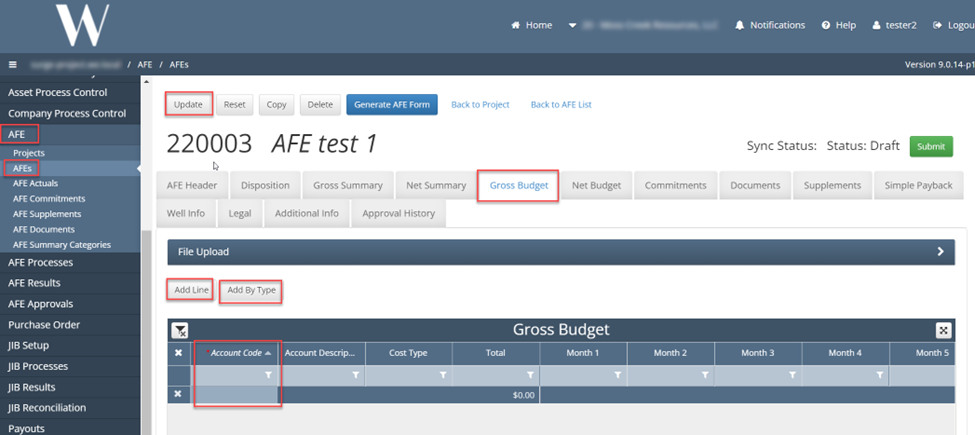
Click on Gross Budget tab. The budget months available are driven by the AFE header fields of Planned Start Date and Budget Months. If adjustments need to be made go back to step 6.
Click on:
Add Line – this will allow for the budget to be added line by line or
Add by Type – this will pull in all accounts tied to a specific budget template
Enter the budget amount on each line.
Click update at the top of the screen.
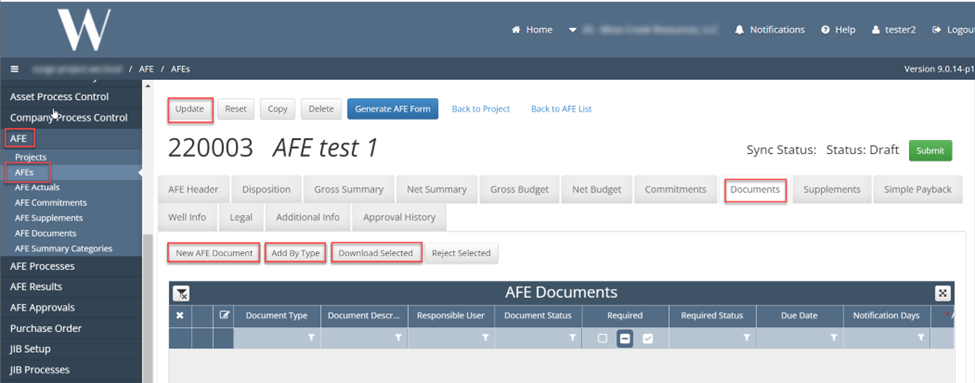
Click on Documents. This is an optional tab and deemed by required by your business process.
Click on New AFE Document
Select the document type to load via the drop down. If a document type is missing refer to “Create a Project” manual for additional directions on how to add a document.
Click on create.
Scroll down to the Attach a New Document Section.
Click on Choose file.
Select the File.
Click on Upload File.
Click Update at the top of the page

Navigate back to AFE>AFEs and select the AFE currently being setup.
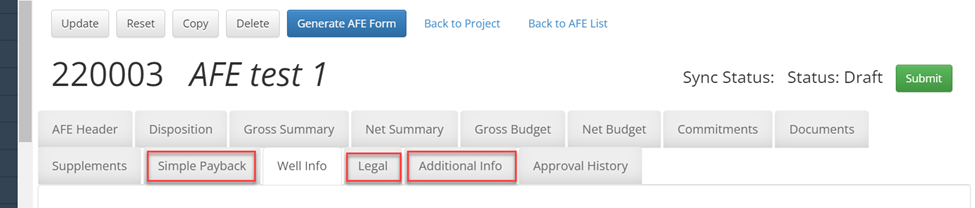
Additional tabs that data can be entered as needed.
Simple Payback – refer to the AFE manual for additional information on the calculation.
Legal
Additional Information – client driven data fields.
Information tabs
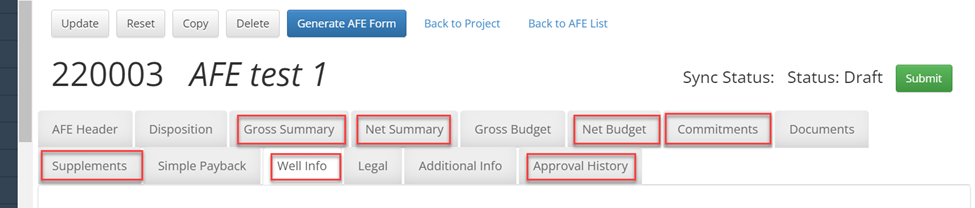
Gross Summary
Net Summary – the data from Gross summary that uses company net by the DO or by the override interest entered in the AFE header tab.
Net Budget – calculated from the Gross Budget tab and using the DO or the override interest entered in the AFE tab.
Supplements – refer to Add an AFE Supplement guide. Typically, not populated at the beginning of the project.
Commitments – used once a project is underway to capture field estimates in preparation for a system accrual using Staged Commitment Method.
Well Info
Approval History
13. Click on Submit in the top right corner. This will now follow the approval process.
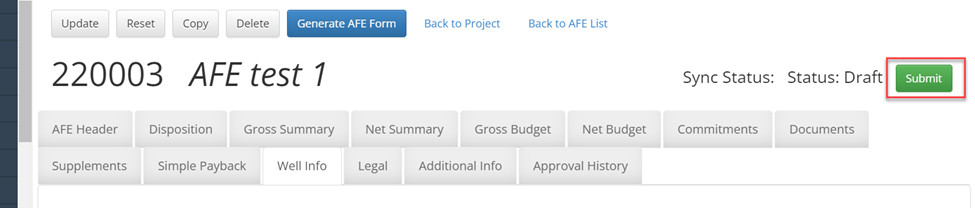
Part 2: How to setup an AFE in the system
Navigate to AFE>AFEs
Click on File Upload
Click on AFE Template
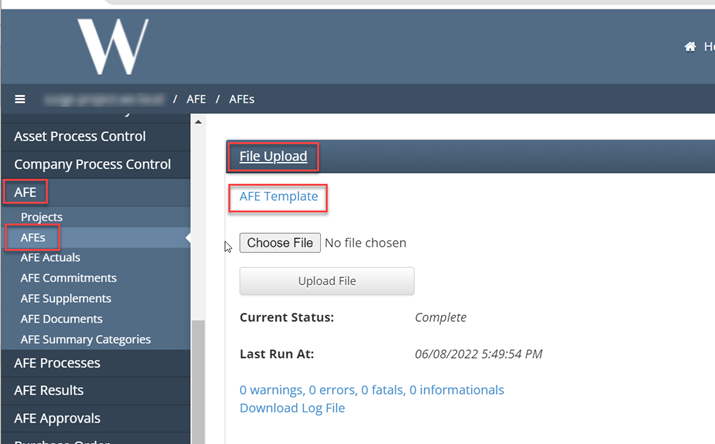
Open the template file in excel. Populate appropriate fields on each tab:
On the AFE header tab:
Temporary Reference ID*- Used in the spreadsheet only to link the tabs
AFE Type*
AFE Name*
Budget Months: defaults to 12 but can be adjusted to different if needed.
Planned Start Date* - drives what month the budget period starts.
Financial AFE Number – this can be used to track the AFE that may have a different number is another system.
Financial Cost Center*
Upstream Division Order – can be used to calculate Net Budget if Gross is entered.
Field*
Net Interest – if a different interest wants to be used than what is on the deck.
Override Net Interest – check the box if entering a Net Interest.

On the AFE Gross Budget tab:
Temporary Reference ID* - Used in the spreadsheet only to link the tabs
AFE Number*
Account Code*
Monthly Offset* - 1 = first month of budget, 2 = next month of budget
Amount*
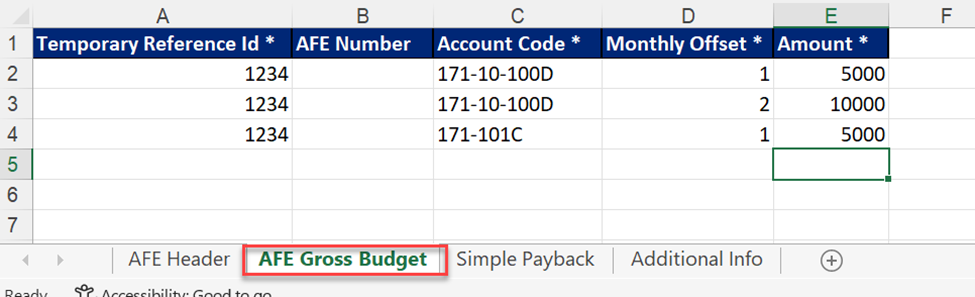
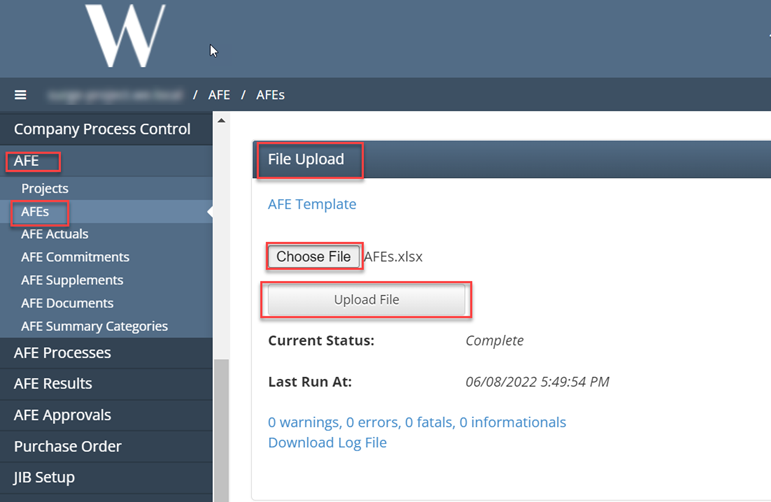
Navigate back to AFE>AFEs
Click on File Upload.
Click on Choose File.
Click on Upload File.
Review load results.
How does this concept impact/feed other areas in the application?
For example, Check input is required for Revenue to to allocate funds to correct owners.